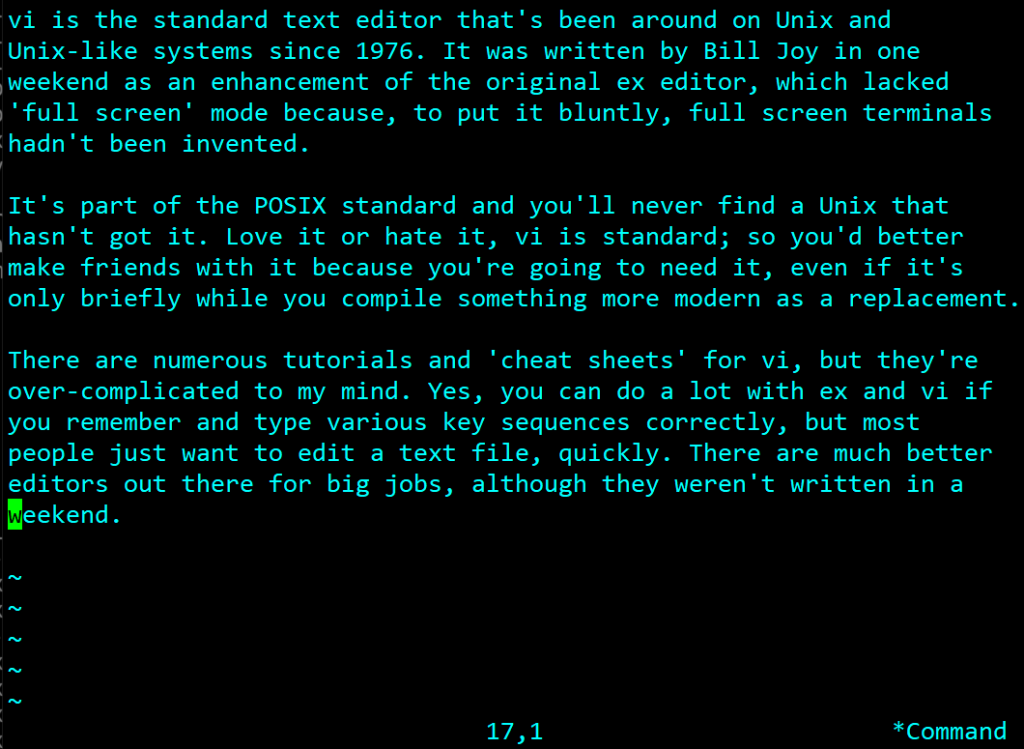
How hot is your FreeBSD machine?

FreeBSD may be the hottest operating system available, but having hot hardware isn’t so good. Modern drives and CPUs can report their temperature, but it’s not easy to see it.

I’ve produced an example script that will report the temperature of whatever it can, with the idea that it can form the basis of whatever you really need to do. I have a multi-server monitoring system using the same methods.

Getting the CPU core temperature is a simple sysctl variable, but it only appears if you have the coretemp.ko module loaded or compiled into the kernel. But coretemp.ko only works for Intel processors; for AMD you need amdtemp.ko instead.

The script tries to determine the CPU type the best way I know how, and loads the appropriate module if necessary. If it loads the module, it unloads the module at the end to leave things as it found them. You can omit the unload so it’s loaded on first, or put the module permanently in loader.conf if you prefer. But this is only an example, and I prefer to keep my scripts independent of host configuration.

Next you need a way to get the temperature from all your drives. This isn’t built in to FreeBSD but you can use the excellent the excellent smartmontools https://www.smartmontools.org by Bruce Allen and Christian Franke.

This was originally intended to access the SMART reporting on ATA drives, but will now extract information for SAS units too. To smartmontools, and the “smartctl” utility in particular, you can build from ports with:

cd /usr/ports/sysutils/smartmontools
make install clean

You can also install it as a binary package with: “pkg install smartmontools”

Please generate and paste your ad code here. If left empty, the ad location will be highlighted on your blog pages with a reminder to enter your code. Mid-Post

The script tries to enumerate the drives and CPUs on the system. ATA drives are in /dev/ and begin “ada”, SCSI and USB drives begin “da”. The trick is to figure out which devices are drives and which are partitions or slices within a drive – I don’t have a perfect method.

SCSI drives that aren’t disks (i.e. tape) start “sa”, and return some really weird stuff when smartctl queries them. I’ve tested the script with standard LTO tape drives, but you’ll probably need to tweak it for other things. (Do let me know).

Figuring out the CPUs is tricky, as discrete CPUs and cores within a single chip appear the same. The script simply goes on the cores, which results in the same temperature being reported for each.

You can override any of the enumeration by simply assigning the appropriate devices to a list, but where’s the fun? Seriously, this example shows how you can enumerate devices and it’s useful when you’re monitoring disparate hosts using the same script.

Finally, there are three loops that read the temperature for each device type into into “temp” and then print it. Do whatever you want – call “shutdown -p now” if you think something’s too hot; autodial the fire brigade or, as I do, send yourself an email.

The Script

#!/bin/sh
# FreeBSD Temperature monitoring example script
# (c) FJL 2024 frank@fjl.co.uk
# Please feel free to use this as an example for a few techniques
# including enumerating devices on a host and extracting temperature
# information.

# Full path to utilities in case run with no PATH set
GREP=/usr/bin/grep SMARTCTL=/usr/local/sbin/smartctl
CUT=/usr/bin/cut
SYSCTL=/sbin/sysctl

# Load the AMD CPU monitoring driver if necessary
if [ ! $($SYSCTL -n dev.cpu.0.temperature 2>/dev/null) ]
then
# Let's try to find out if we have Intel or
# AMD processor and select correct kernel module
if $SYSCTL -n hw.model | $GREP AMD >/dev/null
then
tempmodule=amdtemp
else
tempmodule=coretemp
fi
# Load the CPU temp kernel module
kldload $tempmodule
# Set command to unload it when we're done (optional)
unload="kldunload $tempmodule"
fi
# Enumerate SATA, USB and SAS disks - everything
# in /dev/ starting da or ada, except where there's an s or p in it
disks=$(find /dev -depth 1 \( -name da\* -o -name ada\* \) -and -not -name \*s\* -and -not -name \*p\* | cut -c 6- | sort )

# Enumerate other SCSI devices, starting in sa.
# Normally tape drives. May need tweaking!
scsis=$(find /dev -depth 1 \( -name sa\* \) -and -not -name \*.ctl | cut -c 6- | sort)

# Enumerate the CPUs
cpus="$(seq 0 $(expr $($SYSCTL -n hw.ncpu ) - 1))"

# Print all the ATA disks
for disk in $disks
do
temp=$($SMARTCTL -a /dev/$disk | $GREP Temperature_Celsius | $CUT -w -f 10)
echo "$disk: ${temp}C" done

# Print all the SCSI devices (e.g. tapes)
# NB. This will probably take a lot of fiddling as SCSI units return all sorts to smartctl
# Note the -T verypermissive. see man smartctl for details.
for scsi in $scsis
do
temp=$($SMARTCTL -a -T verypermissive /dev/$scsi | $GREP "Current Drive Temperature" | cut -w -f 4)
echo "$scsi: ${temp}C"
done

# Print all the CPUs
for cpu in $cpus
do
temp=$($SYSCTL -n dev.cpu.$cpu.temperature | $CUT -f 1 -d .)
echo "CPU$cpu: ${temp}C"
done

# Unload the CPU temp kernel module if we loaded it (optional)
$unload

Example Output

ada0: 35C
ada1: 39C
ada2: 39C
ada3: 38C
da0: 24C
da1: 25C
sa0: 33C
CPU0: 48C
CPU1: 48C

Why people obsess about the ZFS SLOG, but shouldn’t

There are two mysteries things on ZFS that cause a lot of confusion: The ZIL and the SLOG. This article is about what they are and why you should care, or not care about them. But I’ll come to them later. Instead I’ll start with POSIX, and what it says about writing stuff to disk files.

When you write to disk it can either be synchronous or asynchronous. POSIX (Portable Operating System Interface) has requirements for writes through various system calls and specifications.

With an asynchronous write the OS takes the data you give it and returns control to the application immediately, promising to write the data as soon as possible in the background. No delay. With a synchronous write the application won’t get control back until the data is actually written to the disk (or non-volatile storage of some kind). More or less. Actually, POSIX.1-2017 (IEEE Standard 1003.1-2017) doesn’t guarantee it’s written, but that’s the expectation.

You’d want synchronous writes for critical complex files, such as a database, where the internal structure would break if a transaction was only half written, and a database engine needs to know that one write has occurred before making another.

Writes to ZFS can be long and complicated, requiring multiple blocks be updated for a single change. This is how it maintains its very high integrity. However, this means it can take a while to write even the simplest thing, and a synchronous write could take ages (in computer terms).

To get around this, ZFS maintains a ZIL – ZFS Intent Log.

In ZFS, the ZIL primarily serves to ensure the consistency and durability of write operations, particularly for synchronous writes. But it’s not a physical thing; it’s a concept or list. It contains transaction groups that need to be completed in order.

The ZIL can be physically stored in three possible places…

In-Memory (Volatile Storage):

This is the default location. Initially, all write operations are buffered in RAM. This is where they are held before being committed to persistent storage. This kind ofZIL is volatile because it’s not backed by any permanent storage until written to disk.

Volatility doesn’t matter, because ZFS guarantees consistency with transaction groups (TXGs). The power goes off and the in-RAM ZIL is lost, the transactions are never applied; but the file system is in a consistent state.

In-Pool (Persistent Storage):

Without a dedicated log device, the ZIL entries are written to the main storage pool in transaction groups . This happens for both synchronous and asynchronous writes but is more critical for synchronous writes to ensure data integrity in case of system crashes or power failures.

SLOG (Separate Intent Log Device):

For better performance with synchronous writes, you can add a dedicated device to serve as the SLOG. This device is typically a low-latency, high-speed storage like a short-stroked Rapter, enterprise SSD or NVRAM. ZFS writes the log entries before they’re committed to the pool’s main storage.

By storing the pending TXGs on disk, either in the pool or on an SLOG, ZFS can meet the POSIX requirement that the transaction is stored in non-volatile storage before the write returns, and if you’re doing a lot of synchronous writes then storing them on a high-speed SLOG device helps. But only if the SLOG device is substantially faster than an array of standard drives. And it only matters if you do a lot of synchronous writes. Caching asynchronous writes in RAM is always going to be faster still

I’d contend that the only times synchronous writes feature heavily are databases and virtual machine disks. And then there’s NFS, which absolutely loves them. See ESXi NFS ZFS and vfs-nfsd-async for more information if this is your problem.

If you still think yo need an SLOG, install a very fast drive. These days an NVMe SLC NAND device makes sense. Pricy, but it doesn’t need to be very large. You can add it to a zpool with:

zpool add poolname
log /dev/daX

Where daX is the drive name, obviously.

As I mentioned, the SLOG doesn’t need to be large at all. It only has to cope with five seconds of writes, as that’s the maximum amount of time data is “allowed” to reside there. If you’re using NFS over 10Gbit Ethernet the throughput isn’t going to be above 1.25Gb a seconds. Assuming that’s flat-out synchronous writes, multiplying that by five seconds is less than 8Gb. Any more would be unused.

If you’ve got a really critical system you can add mirrored SLOG drives to a pool thus:

zpool add poolname
log /dev/daX /dev/daY

You can also remove them with something like:

zpool remove
poolname log /dev/daY

This may be useful if adding an SLOG doesn’t give you the performance boost you were hoping for. It’s very niche!

Proper Case in a shell script

How do you force a string into proper case in a Unix shell script? (That is to say, capitalise the first letter and make the rest lower case). Bash4 has a special feature for doing it, but I’d avoid using it because, well, I want to be Unix/POSIX compatible.

It’s actually very easy once you’ve realised tr won’t do it all for you. The tr utility has no concept on where in the input stream it is, but combining tr with cut works a treat.

I came across this problem when I was writing a few lines to automatically create directory layouts for interpreted languages (in this case the Laminas framework). Languages of this type like capitalisation of class names, but other names have be lower case.

Before I get started, I note about expressing character ranges in tr. Unfortunately different systems have done it in different ways. The following examples assume BSD Unix (and POSIX). Unix System V required ranges to be in square brackets – e.g. A-Z becomes “[A-Z]”. And the quotes are absolutely necessary to stop the shell globing once you’ve introduced the square brackets!

Also, if you’re using a strange character set, consider using \[:lower:\] and \[:upper:\] instead of A-Z if your version of tr supports it (most do). It’s more compatible with foreign character sets although I’d argue it’s not so easy on the eye!

Anyway, these examples use A-Z to specify ASCII characters 0x41 to 0x5A – adjust to suit your tr if your Unix is really old.

To convert a string ($1) into lower case, use this:

lower=$(echo $1 | tr A-Z a-z)

To convert it into upper case, use the reverse:

upper=$(echo $1 | tr a-z A-Z)

To capitalise the first letter and force the rest to lower case, split using cut and force the first character to be upper and the rest lower:

proper=$(echo $1 | cut -c 1 | tr a-z A-Z)$(echo $1 | cut -c 2- | tr A-Z a-z)

A safer version would be:

proper=$(echo $1 | cut -c 1 | tr "[:lower:]" "[:upper:]")$(echo $1 | cut -c 2- | tr "[:upper:]" [":lower:"])

This is tested on FreeBSD in /bin/sh, but should work on all BSD and bash-based Linux systems using international character sets.

You could, if you wanted to, use sed to split up a multi-word string and change each word to proper case, but I’ll leave that as an exercise to the reader.

Reply-To: gmail spam and Spamassassin

Over the last few months I’ve noticed huge increase is spam with a “Reply To:” field set to a gmail address. What the miscreants are doing is hijacking a legitimate mail server (usually a Microsoft one) and pumping out spam advertising a service of some kind. These missives only work if the mark is able to reply, and as even a Microsoft server will be locked down sooner or later, so they’ll never get the reply.

The reason for sending this way is, of course, spam from a legitimate mail server isn’t going to be blacklisted or blocked. SPF and other flags will be good. So these spams are likely to land in inboxes, and a few marks will reply based on the law of numbers.

To get the reply they’re using the email “Reply-To:” field, which will direct the reply to an alternative address – one which Google is happy to supply them for nothing.

The obvious way of detecting this would be to examine the Reply-To: field, and if it’s gmail whereas the original sender isn’t, flag it as highly suspect.

I was about to write a Spamassassin rule to do just this, when I discovered there is one already – and it’s always been there. The original idea came from Henrik Krohns in 2009, but it’s time has now definitely arrived. However, in a default install, it’s not enabled – and for a good reason (see later). The rule you want is FREEMAIL_FORGED_REPLYTO, and it’s found in 20_freemail.cf

Enabling FREEMAIL_FORGED_REPLYTO in Spamassassin

If you check 20_freemail.cf you’ll see the rules require Mail::SpamAssassin::Plugin::FreeMail, The FreeMail.pm plugin is part of the standard install, but it’s very likely disabled. To enable this (or any other plugin) edit the init.pre file in /usr/local/etc/mail/spamassassin/ Just add the following to the end of the file:

# Freemail checks
#
loadplugin Mail::SpamAssassin::Plugin::FreeMail FreeMail.pm

You’ll then need to add a list of what you consider to be freemail accounts in your local.cf (/usr/local/etc/mail/spamassassin/local.cf). As an example:

freemail_domains aol.* gmail.* gmail.*.* outlook.com hotmail.* hotmail.*.*

Note the use of ‘*’ as a wildcard. ‘?’ matches a single character, but neither match a ‘.’. It’s not a regex! There’s also a local.cf setting “freemail_whitelist”, and other things documented in FreeMail.pm.

Then restart spamd (FreeBSD: service spamd restart) and you’re away. Except…

The problem with this Rule

If you look at 20_freemail.cf you’ll see the weighting is very low (currently 0.1). If this is such a good rule, why so little? The fact is that there’s a lot of spam appearing in this form, and it’s the best heuristic for detecting it, but it’s also going to lead to false positives in some cases.

Consider those silly “contact forms” beloved by PHP Web Developers. They send an email from a web server but with a “faked” reply address to the person filling in the form. This becomes indistinguishable from the heuristic used to spot the spammers.

If you know this is going to happen you can, of course add an exception. You can even have the web site use a local submission port and send it to a local mailbox without filtering. But in a commercial hosting environment this gets a bit complicated – you don’t know what Web Developers are doing. (How could you? They often don’t).

If you have control over your users, it’s probably safe to up the weighting. I’d say 3.0 is a good starting point. But it may be safer to leave it at 0.1 and examine the results for what would have been false positives.

Networking FreeBSD Jails

Or port forwarding to a jail

I’ve already explained how easy FreeBSD jails are to set up and use without resorting to installing heavy management tools, but today I thought I’d add a bit about networking. Specifically, how do you pass traffic arriving on a particular port to a service running inside a jail?

It’s actually very easy. All you need is a very local network inside FreeBSD, natted to the one outside.

Suppose you have your jail.conf set up as per my previous article. Here’s an excerpt:

tom { ip4.addr = 192.168.0.2 ; }
dick { ip4.addr = 192.168.0.3 ; }
harry { ip4.addr = 192.168.0.4 ; }

The defaults were set earlier in the file; the only thing that’s unique about each jail is the IP4 address and the name. What I didn’t say at the time was that 192.168.0.0 could have been on an internal network.

To define your local network just define it in rc.conf:

cloned_interfaces="lo1"
ipv4_addrs_lo1="192.168.0.1-14/28"

This creates another local loopback interface and assigns a range of IPv4 addresses to it. This can be as large as you wish, but I’ve defined 1..14 (with appropriate subnet mask) because they’ll be listed every time you run ifconfig!

Next you’re going to need something to do the natting. pf is your friend here. I struggled for years using ipfw before I discovered pf.

Enable pf in rc.conf too:

pf_enable="yes"

And you’ll need an /etc/pf.conf file to do the magic. I like pf – it’s easier for my brain to understand than most. Here’s an example file:

PUB_IP="192.168.1.217"
INT="bge0"
JAIL_NET="192.168.0.0/24"
TOM="192.168.0.2"
DICK="192.168.0.3"
HARRY="192.168.0.4"
scrub in all
nat pass on $INT from $JAIL_NET to any -> $PUB_IP
block on $INT proto tcp from any to $PUBIP port 111
rdr pass on $INT proto tcp from any to $PUBIP port 3306 -> $TOM
rdr pass on $INT proto tcp from any to $PUBIP port {21,80,443} -> $DICK
rdr pass on $INT proto tcp from any to $PUBIP port 81 -> $HARRY port 80

So what’s going on?

I’ve used a few macros. PUB_IP is your public IP address, and INT is the interface it’s on. pf may figure some of this out, but I’m being explicit.

TOM, DICK and HARRY are the IPv4 addresses of the jails.

Next I’m scrubbing all interfaces (normally a good idea, but you don’t have to). But the next line is important – it uses nat to allow stuff on your jail network to talk to the outside world.

The following line is where you might want to block more stuff – in this case NFS on port 111. Then we’re back to jail things for the final three lines. They’re pretty self-explanatory, but here’s an explanation anyway.

Let’s say the tom jail is running a MariaDB server on port 3306. The first line takes anything arriving on port 3306 and sends it to tom’s jail IP. Simple. It can reply because of the nat line earlier.

dick is running a web and ftp server, so ports 21,80 and 443 are sent there. The pf syntax lets you do nice stuff like this with the {..}

Finally we come to harry. Here we’re running an http server on port 80, but to make it accessible externally we’re mapping it to port 81 as otherwise it would clash with dick. In other words, if you don’t specify a destination port in the redirect it will assume the same as the source port.

And that’s it! When you jail is started you will see an interface lo1 with the IP address defined in /etc/jail.conf and assuming you have something sensible in /etc/resolv.conf you’ll have a jail that looks like it’s running behind a NAT router with port forwarding.

Of course, if you don’t need to map a jailed service to an external IP address, don’t! Jails can access services on each other using their own virtual network.

FreeBSD in Godden Green

What is going on with FreeBSD in Godden Green in Kent, UK? Jobsite has been spamming me with junior/mid-level programmer roles mentioning FreeBSD for months now, and I’m getting curious!

I have an alert set up so whenever FreeBSD is mentioned I get a ping, as I like to know what’s going on. This isn’t one of the usual suspect AFAIK – they might even be interesting!

ZFS is not always the answer. Bring back gmirror!

The ZFS bandwaggon has momentum, but ZFS isn’t for everyone. UFS2 has a number of killer advantages in some applications.

ZFS is great if you want to store a very large number of normal files safely. It’s copy-on-write (COW) is a major advantage for backup, archiving and general data safety, and datasets allow you to fine-tune almost any way you can think of. However, in a few circumstances, UFS2 is better. In particular, large random-access files do badly with COW.

Unlike traditional systems, a block in a file isn’t overwritten in place, it always ends up at a different location. If a file started off contiguous it’ll pretty soon be fragmented to hell and performance will go off a cliff. Obvious victims will be databases and VM hard disk images. You can tune for these, but to get acceptable performance you need to throw money and resources to bring ZFS up to the same level. Basically you need huge RAM caches, possibly an SLOG, and never let your pool get more than 50% full. If you’re unlucky enough to end up at 80% full ZFS turns off speed optimisations to devote more RAM to caching as things are going to get very bad fragmentation-wise.

If these costs are a problem, stuck with UFS. And for redundancy, there is still good old GEOM Mirror (gmirror). Unfortunately the documentation of this now-poor relation has lagged a bit, and what once worked as standard, doesn’t. So here are some tips.

The most common use of gmirror (with me anyway) is a twin-drive host. Basically I don’t want things to fail when a hard disk dies, so I add a second redundant drive. Such hosts (often 1U servers) don’t have space for more than two drives anyway – and it pays to keep things simple.

Setting up a gmirror is really simple. You create one using the “gmirror label” command. There is no “gmirror create” command; it really is called “label”, and it writes the necessary metadata label so that mirror will recognise it (“gmirror destroy” is present and does exactly what you might expect).

So something like:

gmirror label gm0 ada1 ada2

will create a device called /dev/mirror/gm0 and it’ll contain ada1’s contents mirrored on to ada2 (once it’s copied it all in the background). Just use /dev/mirror/gm0 as any other GEOM (i.e. disk). Instead of calling it gm0 I could have called it gm1, system, data, flubnutz or anything else that made sense, but gm0 is a handy reminder that it’s the first geom mirror on the system and it’s shorter to type.

The eagle eyed might have noticed I used ada1 and ada2 above. You’ve booted off ada0, right? So what happens if you try mirroring yourself with “gmirror label gm0 ada0 ada1“? Well this used to work, but in my experience it doesn’t any more. And on a twin-drive system, this is exactly what you want to do. But it is still possible, read on…

How to set up a twin-drive host booting from a geom mirror

First off, before you do anything (even installing FreeBSD) you need to set up your disks. Since the IBM XT, hard disks have been partitioned using an MBR (Master Boot Record) at the start. This is really old, naff, clunky and Microsoft. Those in the know have been using the far superior GPT system for ages, and it’s pretty cross-platform now. However, it doesn’t play nice with gmirror, so we’re going to use MBR instead. Trust me on this.

For the curious, know that GPT keeps a copy of the partition table at the beginning and end of the disk, but MBR only has one, stored at the front. gmirror keeps its metadata at the end of the disk, well away from the MBR but unfortunately in exactly the same spot as the spare GPT. You can hack the gmirror code so it doesn’t do this, or frig around with mirroring geoms rather than whole disks and somehow get it to boot, but my advice is to stick to MBR partitioning or BSDlabels, which is an extension. There’s not a lot of point in ever mounting your BSD boot drive on a non-BSD system, so you’re not losing much whatever you choose.

Speaking of metadata, both GPT and gmirror can get confused if they find any old tables or labels on a “new” disk. GPT will find old backup partition tables and try to restore them for you, and gmirror will recognise old drives as containing precious data and dig its heels in when you try to overwrite it. Both gpart and gmirror have commands to erase their metadata, but I prefer to use dd to overwrite the whole disk with zeros anyway before re-use. This checks that the disk is actually good, which is nice to know up-front. You could just erase the start and end if you were in a hurry and wanted to calculate the offsets.

The next thing you’ll need to do is load the geom_mirror kernel module. Either recompile the kernel with it added, or if this fills you with horror,  just add ‘load_geom_mirror=”yes”‘ to /boot/loader.conf. This does bring it in early enough in the process to let you boot from it. The loader will boot from one drive or the other and then switch to mirror mode when it’s done.

So, at this point, you’ve set up FreeBSD as you like on one drive (ada0), selecting BSDlabels or MBR as the partition method and UFS as the file system. You’ve set it to load the geom_mirror module in loader.conf.  You’re now looking at a root prompt on the console, and I’m assuming your drives are ada0 and ada1, and you want to call your mirror gm0.

Try this:

gmirror label gm0 ada0

Did it work? Well it used to once, but now you’ll probably get an error message saying it could not write metadata to ada0. If (when) this happens I know of one answer, which I found after trying everything else. Don’t be tempted to try everything else yourself (such as seeing if it works with ada1). Anything you do will either fail if you’re lucky, or make things worse. So just reboot, and select single-user mode from the loader menu.

Once you’re at the prompt, type the command again, and this time it should say that gm0 is created. My advice is to now reboot rather than getting clever.

When you do reboot it will fail to mount the root partition and stop, asking for help to find it. Don’t panic. We know where it’s gone. Mount it with “ufs:/dev/mirror/gm0s1a” or whatever slice you had it on if you’ve tried to be clever. Forgot to make a note? Don’t worry, somewhere on the boot long visible on the screen it actually tell you the name of the partition it couldn’t find.

After this you should be “in”. And to avoid this inconvenience next time you boot you’ll need to tweak /etc/fstab using an editor of your choice, although real computer nerds only use vi. What you need to do is replace all references to the actual drive with the gm0 version. Therefore /dev/ada0s1a should be edited to read /dev/mirror/gm0s1a. On a current default install, which no longer partitions the drive, this will only apply the root mount point and the swap file.

Save this, reboot (to test) and you should be looking good. Now all that remains is to add the second drive (ada1 in the example) with the line:

gmirror insert gm0 ada1

You can see the effect by running:

gmirror status

Unless your drive is very small, gm0 will be DEGRADED and it will say something about being rebuilt. The precise wording has changed over time. Rebuilding takes hours, not seconds so leave it. Did I mention it’s a good idea to do this when the system isn’t busy?

How to stop Samba users deleting their home directory and email

Samba Carnival Helsinki summer 2009
Samba Carnival (the real Samba logo is sooo boring)

UNIX permissions can send you around the twist sometimes. You can set them up to do anything, not. Here’s a good case in point…

Imagine you have Samba set up to provide users with a home directory. This is a useful feature; if you log in to the server with the name “fred” you (and only you) will see a network share called “fred”, which contains the files in your UNIX/Linux home directory. This is great for knowledgeable computer types, but is it such a great idea for normal lusers? If you’re running IMAP email it’s going to expose your mail directory, .forward and a load of other files that Windoze users might delete on a whim, and really screw things up.

Is there a Samba option to share home directories but to leave certain subdirectories alone? No. Can you just change the ownership and permissions of the critical files to  root and deny write access? No! (Because mail systems require such files to be owned by their user for security reasons). Can you use permission bits or even an ACL? Possibly, but you’ll go insane trying.

A bit of lateral thinking is called for here. Let’s start with the standard section in smb.conf for creating automatic shares for home directories:

[homes]
    comment = Home Directories
    browseable = no
    writable = yes

The “homes” section is special – the name “homes” is reserved to make it so. Basically it auto-creates a share with a name matching the user when someone logs in, so that they can get to their home directory.

First off, you could make it non-writable (i.e. set writable = no). Not much use to use luser, but it does the job of stopping them deleting anything. If read-only access is good enough, it’s an option.

The next idea, if you want it to be useful, is to use the directive “hide dot files” in the definition. This basically returns files beginning in a ‘.’ as “hidden” to Windoze users, hiding the UNIX user configuration files and other stuff you don’t want deleted. Unfortunately the “mail” directory, containing all your loverly IMAP folders is still available for wonton destruction, but you can hide this too by renaming it .mail. All you then need to do is tell your mail server to use the new name. For example, in dovecot.conf, uncomment and edit the line thus:

mail_location = mbox:~/.mail/:INBOX=/var/mail/%u

(Note the ‘.’ added at the front of ~/mail/)

You then have to rename each of the user’s “mail” folders to “.mail”, restart dovecot and the job is done.

Except when you have lusers who have turned on the “Show Hidden Files” option in Windoze, of course. A surprising number seem to think this is a good idea. You could decide that hidden files allows advanced users control of their mail and configuration, and anyone messing with a hidden file can presumably be trusted to know what you’re doing. You could even mess with Windoze policies to stop them doing this (ha!). Or you may take the view that all lusers and dangerous and if there is a way to mess things up, they’ll find it and do it. In this case, here’s Plan B.

The trick is to know that the default path to shares in [homes] is ‘~’, but you can actually override this! For example:

[homes]
    path = /usr/data/flubnutz
    ...

This  maps users’ home directories in a single directory called ‘flubnutz’. This is not that useful, and I haven’t even bothered to try it myself. When it becomes interesting is when you can add a macro to the path name. %S is a good one to use because it’s the name as the user who has logged in (the service name). %u, likewise. You can then do stuff like:

[homes]
     path = /usr/samba-files/%S
     ....

This stores the user’s home directory files in a completely different location, in a directory matching their name. If you prefer to keep the user’s account files together (like a sensible UNIX admin) you can use:

[homes]
     comment = Home Directories
     path = /usr/home/%S/samba-files
     browseable = no
     writable = yes<

As you can imagine, this stores their Windows home directory files in a sub-directory to their home directory; one which they can’t escape from. You have to create “~/samba-files” and give them ownership of it for this to work. If you don’t want to use the explicit path, %h/samba-files should do instead.

I’ve written a few scripts to create directories and set permissions, which I might add to this if anyone expresses an interest.