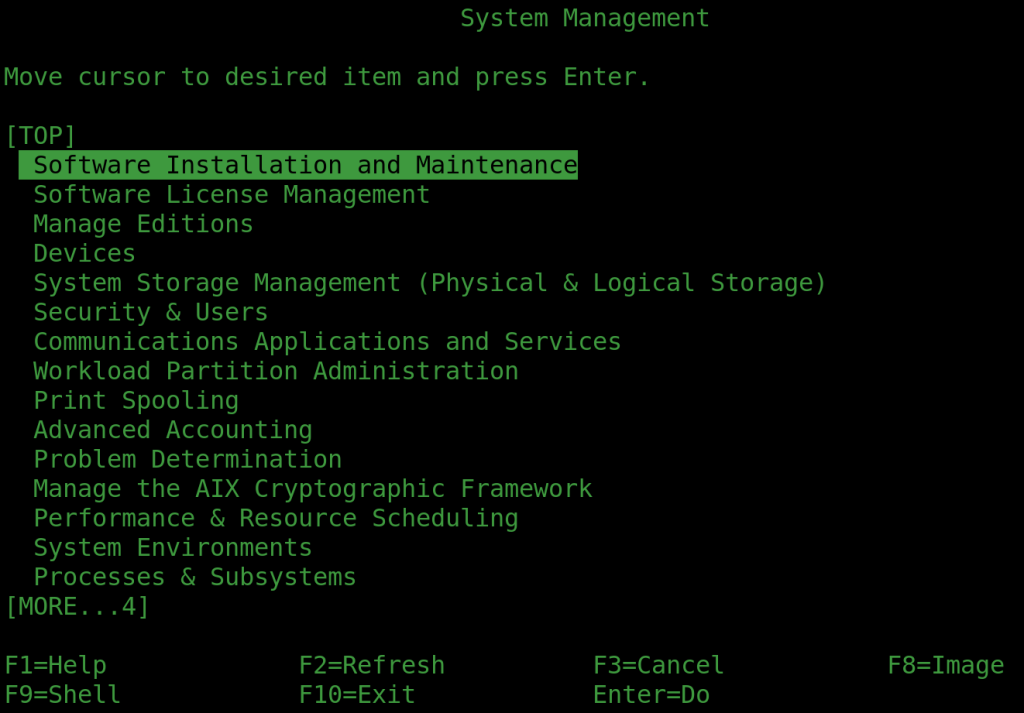
Function Keys with Apache Guacamole and AIX

To use AIX you really need working function keys on your keyboard – programs like SMIT use them a lot. But if you’re using Guacamole you’ll notice that F1..F5 don’t work. You can verify you have the problem by keying them in and they appear to produce the letters A..E. The workaround is to key ESC-1 for F1 ESC-2 for F2 etc but it’s a pain.

If you do a hex dump of the keyboard input you’ll discover F1 is actually sending 1b 5b 5b 41, which are the ASCII codes for the Escape key followed by ‘[[‘ followed by upper-case A. What?

Normal terminals output ^[[[11~ for F1, ^[[[12~ for F2, ^[[[13~ for F3 and so on. (^[ generates 0x1b – i.e. the same as the ASCII Escape key. ^ conventionally means type the next character with the Ctrl key). Guacamole uses the conventional definitions for F6 onwards, but not the first five. Although function keys are programmable on real terminals, if you remember those, no one ever programmed them because if they were used in an application it wouldn’t recognise the macro you’d changed them to, as it’d be expecting the default sequence. The application on the host could reprogram them, of course, but it would have to do this for every terminal type – including new ones it didn’t know about – and the whole thing got silly. So anyone with any sense left them to send the macro as standard, out-of-the-box.

So why on earth does Guacamole send something completely different for the first five? It’s something to do with Linux, where a long time ago someone who didn’t understand what was going on broke the convention. And, it turns out, Guacamole is emulating a Linux keyboard/terminal by default. There is a plan to fix this, but it can’t do it in the current 1.6.0 version. Incidentally, I’m talking about AIX 7.3 (and not expecting a new version for that any time ever).

No problem – you can fix this by setting the terminal-type parameter in user-mapping.xml to something AIX knows about, right? VT220 perhaps. Right? Wrong! It turns out that Guacamole ignores this – it just feeds it to the host when it asks for a terminal ID. It doesn’t change the way it behaves itself at all – the function keys are still wonky.

To fix this issue you’ll need fix the termcap on AIX, creating a Guacamole-specific set of mappings and then (ideally) get Guacamole to ask AIX to select it for you.

There are two ways to fix the termcap, DIY or cut/paste from the one I’ll include below. It’s possibly better to get used to doing it yourself as you might find some other things that need tweaking.

First dump the existing xterm information, which is otherwise “close enough”:

infocmp xterm >xterm-guac.ti

Next open xterm-guac.ti in the editor of your choice (vi or vi with AIX) to find the function key mappings and change them to what Guacamole actually sends. The best way to see what’s actually being sent by any key is to use the standard Unix utility “hd” to hex dump stdin, but it’s not no AIX so you’ll have to use “od -x” instead. Come on IBM! We stopped using octal when we went from 12 to 16-bit (PDP-11 in 1970)

The first (non-comment) line of xterm-guac.ti file defines which terminal this is – it’s not taken from the filename. Having just dumped the xterm definitions, it will say it’s “xterm”. We want to define a new terminal rather than redefining xterm, because although this would work, the next time someone logs on using, say, PUTTY or actual xterm they’ll be swearing at whoever broke the function keys for them.

So the top line should read something like:

xterm-guac|Guacamole terminal emulator

Further down you’ll find entries like this (for F1): “kf1=\E[[[11~” Change them to what’s actually sent, i.e. “kf1=\E[[A“. The “\E” is the way the termcap system specifies the Escape key, because you can never have enough conventions. The definitions are comma separated – the ‘,’ is not part of the sequence!

Once you’ve saved the file you need to compile and install it, which is really easy:

tic -v xterm-guac.ti

The -v is optional – it just outputs a couple of lines so you know it’s done something:

Working in /usr/share/lib/terminfo
Created x/xterm-guac

And now you’re good to go – AIX has a new type of terminal that matches Guacamole. All you need to do now is tell Guacamole it’s there by editing the connection data in user-mapping.xml (or the equivalent if you’re using a different authentication module). Something like this works well to get that IBM 3270 feeling.

    <connection name="AIX 8">
            <protocol>ssh</protocol>
            <param name="hostname">your-hostname</param>
            <param name="port">22</param>
            <param name="font-name">monospace</param>
            <param name="font-size">24</param>
            <param name="color-scheme">green-black</param>
            <param name="terminal-type">xterm-guac</param>
    </connection>

You don’t need to restart Tomcat, just log out and back in as a user and Guacamole-client will pick up the new settings.

Happy smittying!

Finally, as promised, here’s the tweaked terminal definition (i.e. xterm-guac.ti):

xterm-guac|X11 terminal emulator,
        am, bce, km, mc5i, mir, msgr, npc, xenl,
        colors#8, cols#80, it#8, lines#24, pairs#64,
        acsc=``aaffggiijjkkllmmnnooppqqrrssttuuvvwwxxyyzz{{||}}~~,
        bel=^G, blink=\E[5m, bold=\E[1m, cbt=\E[Z,
        civis=\E[?25l, clear=\E[H\E[2J, cnorm=\E[?12l\E[?25h,
        cr=\r, csr=\E[%i%p1%d;%p2%dr, cub=\E[%p1%dD, cub1=\b,
        cud=\E[%p1%dB, cud1=\n, cuf=\E[%p1%dC, cuf1=\E[C,
        cup=\E[%i%p1%d;%p2%dH, cuu=\E[%p1%dA, cuu1=\E[A,
        cvvis=\E[?12;25h, dch=\E[%p1%dP, dch1=\E[P,
        dl=\E[%p1%dM, dl1=\E[M, ech=\E[%p1%dX, ed=\E[J,
        el=\E[K, el1=\E[1K, flash=\E[?5h$<100>\E[?5l,
        home=\E[H, hpa=\E[%i%p1%dG, ht=\t, hts=\EH,
        ich=\E[%p1%d@, il=\E[%p1%dL, il1=\E[L, ind=\n,
        indn=\E[%p1%dS, invis=\E[8m,
        is2=\E[!p\E[?3;4l\E[4l\E>, kDC=\E[3;2~, kEND=\E[1;2F,
        kHOM=\E[1;2H, kIC=\E[2;2~, kLFT=\E[1;2D, kNXT=\E[6;2~,
        kPRV=\E[5;2~, kRIT=\E[1;2C, kb2=\EOE, kbs=\b,
        kcbt=\E[Z, kcub1=\EOD, kcud1=\EOB, kcuf1=\EOC,
        kcuu1=\EOA, kdch1=\E[3~, kend=\EOF, kent=\EOM,
        kf1=\E[[A, kf10=\E[21~, kf11=\E[23~, kf12=\E[24~,
        kf13=\E[2P, kf14=\E[2Q, kf15=\E[2R, kf16=\E[2S,
        kf17=\E[15;2~, kf18=\E[17;2~, kf19=\E[18;2~,
        kf2=\E[[B, kf20=\E[19;2~, kf21=\E[20;2~,
        kf22=\E[21;2~, kf23=\E[23;2~, kf24=\E[24;2~,
        kf25=\E[5P, kf26=\E[5Q, kf27=\E[5R, kf28=\E[5S,
        kf29=\E[15;5~, kf3=\E[[C, kf30=\E[17;5~,
        kf31=\E[18;5~, kf32=\E[19;5~, kf33=\E[20;5~,
        kf34=\E[21;5~, kf35=\E[23;5~, kf36=\E[24;5~,
        kf37=\E[6P, kf38=\E[6Q, kf39=\E[6R, kf4=\E[[D,
        kf40=\E[6S, kf41=\E[15;6~, kf42=\E[17;6~,
        kf43=\E[18;6~, kf44=\E[19;6~, kf45=\E[20;6~,
        kf46=\E[21;6~, kf47=\E[23;6~, kf48=\E[24;6~,
        kf49=\E[3P, kf5=\E[[E, kf50=\E[3Q, kf51=\E[3R,
        kf52=\E[3S, kf53=\E[15;3~, kf54=\E[17;3~,
        kf55=\E[18;3~, kf56=\E[19;3~, kf57=\E[20;3~,
        kf58=\E[21;3~, kf59=\E[23;3~, kf6=\E[17~,
        kf60=\E[24;3~, kf61=\E[4P, kf62=\E[4Q, kf63=\E[4R,
        kf7=\E[18~, kf8=\E[19~, kf9=\E[20~, khome=\EOH,
        kich1=\E[2~, kind=\E[1;2B, knl=\r, knp=\E[6~,
        kpp=\E[5~, kri=\E[1;2A, ktab=\t, mc0=\E[i, mc4=\E[4i,
        mc5=\E[5i, op=\E[39;49m, rc=\E8, rev=\E[7m, ri=\EM,
        rin=\E[%p1%dT, rmacs=\E(B, rmam=\E[?7l,
        rmcup=\E[?1049l, rmir=\E[4l, rmkx=\E[?1l\E>,
        rmm=\E[?1034l, rmso=\E[27m, rmul=\E[24m, rs1=\Ec,
        rs2=\E[!p\E[?3;4l\E[4l\E>, sc=\E7,
        setb=\E[4%?%p1%{1}%=%t4%e%p1%{3}%=%t6%e%p1%{4}%=%t1%e%p1%{6}%=%t3%e%p1%d%;m,
        setf=\E[3%?%p1%{1}%=%t4%e%p1%{3}%=%t6%e%p1%{4}%=%t1%e%p1%{6}%=%t3%e%p1%d%;m,
        sgr=%?%p9%t\E(0%e\E(B%;\E[0%?%p6%t;1%;%?%p2%t;4%;%?%p1%p3%|%t;7%;%?%p4%t;5%;%?%p7%t;8%;m,
        sgr0=\E(B\E[m, smacs=\E(0, smam=\E[?7h,
        smcup=\E[?1049h, smir=\E[4h, smkx=\E[?1h\E=,
        smm=\E[?1034h, smso=\E[7m, smul=\E[4m, tbc=\E[3g,
        u6=\E[%i%d;%dR, u7=\E[6n, u8=\E[?1;2c, u9=\E[c,
        vpa=\E[%i%p1%dd,

You’ll notice that the shifted function keys look a bit suspect (e.g. kf13=…) but fixing these is left as an exercise for any reader that actually uses shifted function keys. I can’t find an AIX program that uses them to test it!

Finally, if you’re trying to get the backspace key to work on-screen as well as in the input buffer, try adding “stty echoe” to your .profile.

Incidentally, you may need to fix the standard xterm TI to work with standard XTERM (e.g. PUTTY) as that’s wonked on the AIX side – it depends on how you have PUTTY set up. But that’s another story.

ssh login from Windows to AIX

I’ve written about how bad passwords are for years, and also how to set up certificate login on Unix. But nothing for over ten years – because it hasn’t changed. So today, to make a change, let’s connect Windows 1x command line to AIX (IBM’s Unix).

Windows actually has command line ssh built-in these days. Type ‘ssh’ to make sure yours has it. It also has the standard program to generate ssh keys, called ssh-keygen. So we should be good to go. You can just run it with no options as the defaults are sensible. It looks like this:

C:\Windows> ssh-keygen
Generating public/private ed25519 key pair.
Enter file in which to save the key (C:\Users\FrankL/.ssh/id_ed25519):
Enter passphrase (empty for no passphrase):
Enter same passphrase again:
Your identification has been saved in C:\Users\FrankL/.ssh/id_ed25519
Your public key has been saved in C:\Users\FrankL/.ssh/id_ed25519.pub
The key fingerprint is:
SHA256:x5cMyeR7OoIRl1OrD5hFbPyMYQ+J6dLqqwGAzKeKDeE frankL@FrankPC
The key's randomart image is:
+--[ED25519 256]--+
| =..o |
|+ o.O* o |
|+o . o.o=B* |
|o.o . o*.+++ . |
|oE o+ S + = |
|o+ . o + + |
|o o. . . + |
| .. . . |
| …. |
+----[SHA256]-----+

What you can’t see above is that I’ve actually entered a passphrase (i.e. password) twice. This is highly recommended if you’re not sure your certificates are in a safe place, and as they’re stored on a Windows PC it’s a pretty safe bet they’re not! This password will be required each time the certificate is used. If you’re sure the certificate is safe, you can leave it blank.

Running ssh-keygen will have created a pair of certificates in C:\Users\FrankL\.ssh\ – where the directory name will depend on your username (mine is ‘FrankL’, in case that isn’t obvious). Note the full stop before .ssh – it’s a Unix thing!

There are two certificates – id_ed25519 and id_ed25519.pub. The .pub means it’s the public one. It’s safe (and even required) that everyone can read its contents. The other one is your private certificate, and must be kept completely secure.

The public key will contain something like this:

ssh-ed25519 AAAAC3NzaC1lZDI1NTE5AAAAILgxyzclTiLK/xHWa0wQ80SYQmSu+aWBOVAatqnyP/ke frankL@FrankPC

The first part (up to the space) is the type of key, the middle part is a magic number that can be used with the private key to prove it’s genuine, and the last bit (frankL@FrankPC) is just a comment about where the key comes from. You can edit it to something that makes more sense if required. The key is all on one line, however it appears here.

Next you need to log in to your AIX system using your password. You’ll be in your home directory. SSH keys are kept in a hidden directory called .ssh, which may or may not exist already.

mkdir .ssh
cd .ssh
cat >>authorized_keys

You may already have an authorized_keys file, but it won’t matter as this appends the new key. Paste the public key into the window and type Ctrl-D to end. “authorized_keys” is aa text file and can be modified using an editor of your choice if required.

You can then log out of AIX and return to Windows.

To use your new ssh keys to log in we’re going to have to deal with the fact that your username on Windows may not be the same as on AIX/Unix/Linux, and therefore tell ssh which certificate it needs to use. Let’s assume the AIX machine is called “unixhost” and your user-id on it is just frank (without the L)

ssh unixhost -i C:\Users\FrankL\.ssh\id_ed25519 frank@unixhost

The “-i C:\Users\FrankL\.ssh\id_ed25519” here tells ssh which certificate to use, and we’re forcing the user name to be frank with “frank@” in front of the hostname. If, however, all your user IDs match it will just go to your home directory and use the key it find there. It will, by default, try log you in using the same username on both machines.

If you’ve set a password on your certificate you’ll be prompted for it when you connect. This prevents a stolen certificate from being used. If you haven’t set a password just make sure no one else can get hold of your private certificate! If they do, find the certificate in the authorized_keys file and delete it.

You may also want to move your private certificate to a more convenient location, and you can rename it anything you like.

Using a certificate login is far more secure and convenient that a password – a win-win. For added security, disable password login on the AIX/Unix machine. Just don’t lose your private key! It’s not a bad idea to keep a backup admin account on a host with a very long password that’s only kept on a piece of paper in a sealed envelope in a safe. Because this password isn’t used except in an emergency there no chance it can be pilfered using a keylogger.